C Lesson 1 – Hello World

Last time we looked at creating an application for C. If we follow these steps, we’ll be ready to start writing some code.

One of the first things we’ll want to do is to create a “main” function in our application. This can be done by using the following code:

It acts as the entry point for our application in a way. Without this function, we wouldn’t be able to execute anything else.

But what could we execute? We will need to import some libraries to add functions for us to use. Fortunately, this can be done very easily by using the “#include<>” statement.

For this tutorial we’re using “stdio.h” which is the standard input/output header for C. This will give us access to the “printf” function which we can now use to print “Hello World!”.

In the main function, write the following code:

With that in place, you’re then ready to execute the code. This can be done by clicking the button shown here:

And that’s “Hello World!” done in C.

Next time

Next time we’ll be looking at variables in C, comments that we can do and we’ll talk about how C and C++ have become very intertwined.

Getting Started – C

C is common beginner language as the syntax is quite simple and you don’t have to worry about the object oriented concepts. Many people, myself included, started with C as it is a low level language, which technically does make it faster.

Nowadays, it’s more likely you’ll be working with C++ or C# variants of C but for this tutorial series, we’ll be looking at the ol’ reliable C.

To start, as before you’re going to need an IDE, we’ll be using Visual Studio for Windows here: https://visualstudio.microsoft.com/

However, to my knowledge this won’t work for Mac and Linux users, fortunately Visual Studio Code is available for you to use and for Mac users, a special Visual Studio has been made available.

Once that’s downloaded and installed, you’ll be able to create your first application. To do this, select “C++ Console Application”

You may notice that we’ve got a “.cpp” file instead of a “.c” file. This is fine for us as the code will compile the same as if it were C code, and you can use all C libraries in C++

This is becauce C++ is actually an object-orientation extension of sorts for C.

And that’s the setup done!

Next Time

Next time we will be looking at the “main” function in C, explaining how to use libraries and external imports and the “printf” function. This will then lead to the classic “Hello World!”.

Getting Started – R

R is a great language for calculating and visualizing mathematical equations and functions. It comes with a wide variety of packages that let you to a multitude of tasks, ranging from simply plotting data points in a graph to classical machine learning.

In order to get started in R you’ll need to download some sort of IDE to create and run your scripts. We’ll take a look at two today, and you can pick which one you would like to work with.

Firstly we’ll look at RStudio, available here: https://rstudio.com/

It’s more similar to other IDEs if you’ve done coding before, and feel a lot like Spyder.

The second IDE we’ll show is the R GUI. This is what I use to do most of my work in R just because it’s really simple and easy to understand.

It is available here: https://cran.r-project.org/mirrors.html

Just make sure you pick a mirror close to you to speed up download time.

Once that is downloaded an installed you should be able to find R GUI in your search bar by looking up “R x64 3.6.1”

The next thing we’ll be looking at is making scripts. In the GUI this is done really easily, just by clicking “File” and then “New Script”

It is a similar process in RStudio

But what if we want to download a specialist package? In the command prompt we can type “install.packages()” which then lets you select a mirror and then select a package.

Equally we can put the package name in the brackets to install a specific package.

We can then include the package in the scripte by adding “library()”.

And that is the basics of getting set up so we’re ready to learn more R.

Next time

Next time we’ll be looking at vectors and matrices, the operations you can do with them and the functions available.

Getting Started – Python

Today we’re going to be looking at getting started with Python. In order to make the process really simple, we’re going to be using Anaconda which is a distribution package that basically sets everything up for us in one place.

Navigate over to their website here: https://www.anaconda.com/distribution/ and download the Python 3.7 version for your particular operating system.

When the download is finished, go ahead and install it and when that’s done you’ll be good to run it.

Upon opening the navigator, you’ll meet a screen that looks like this:

This shows the different environments that we can use to develop and run our Python code in. For the purposes of the tutorials, I’d recommend using Jupyter Notebook. However, Spyder is another IDE I would highly recommend. Go ahead and make sure they’re installed.

We’re nearly set up, the last thing we need to know how to do is how to install packages if we need to do that later down the line.

Find the Anaconda prompt in your computer, shown below is how I do it on Windows:

The command to install packages is then:

conda install <package-name>

Where is replaced with the package that you want to install.

And there we have it, we’ve now got everything we need to get started in Python.

Next time

Next time we’ll be looking at the basics/fundamentals of Python.

Java Lesson 9 – Theory

This is the final tutorial in the Java series and today we’ll be focussing more on the theory. We’ll be looking at how Java as a language actually works and the advantages and disadvantages that come with it.

We’ll also be looking at key object orientation concepts and explaining what they mean.

We’ll then have a reflective summary of what you should have learnt by this point. So without any further ado, let’s dive right in.

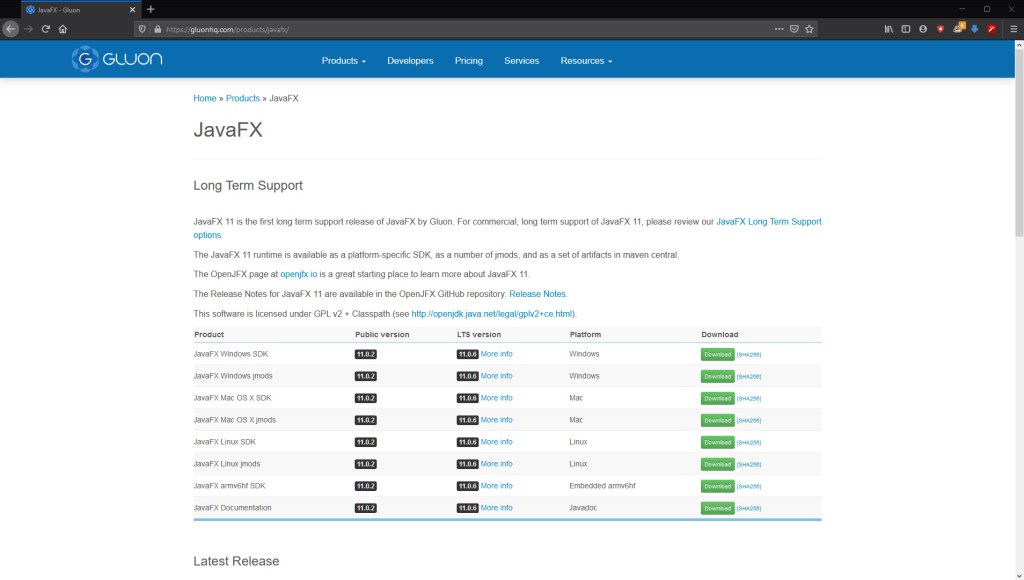
As some of you may know, Java is a cross-platform language. That is to say, you can run Java on a Mac, Windows or Linux computer, which we’ve seen when we went to download the JDK or any applications that are centred around Java development.

This cross-platform nature means that you need not worry about developing different blocks of code for different systems and makes the life of the developer that much easier.

This is because Java is not just solely a language but rather a language coupled with its own computing environment – the JVM.

It is the JVM (Java Virtual Machine) that allows it to run on multiple platforms.

What this allows Java to do is to take the Java code and compile it to byte code. This byte code is then deployed in the JVM, which will determine how to execute the code on the system it is running off.

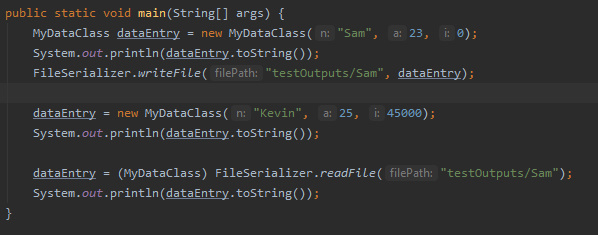
Since the JVM is compiling the byte code at the application runtime, it means that external classes can be loaded during runtime too. This is where things like reflection work, and how you can extend program functionality through abstract classes.

As we said earlier in the series all variables of Object types are references, with all objects being allocated on a heap or potentially a stack.

We also discussed the garbage collector in Java which handles the memory management of Java applications, by removing variables from memory if they have not been referenced recently or will be referenced soon.

Now we’ll take a look at object orientation. As we discussed earlier, Java is an object-oriented language. You write classes which, when instantiated, create objects. But what benefits are there to object orientation and how does this relate to the tutorial material we’ve covered thus far.

The main components/keywords we’ll be examining here are “Abstraction”, “Inheritance”, “Encapsulation” and “Polymorphism”.

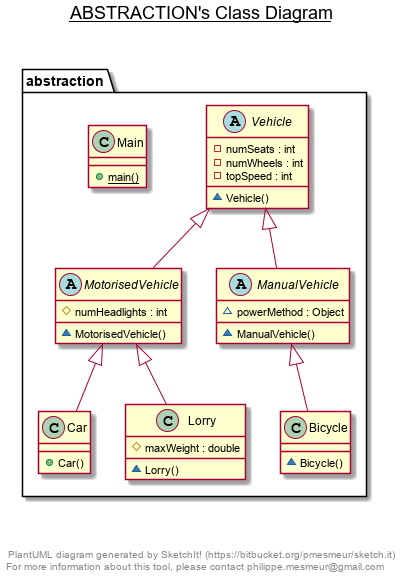
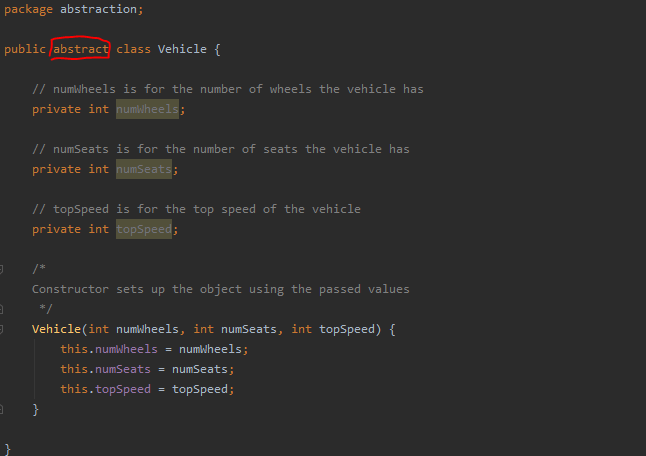
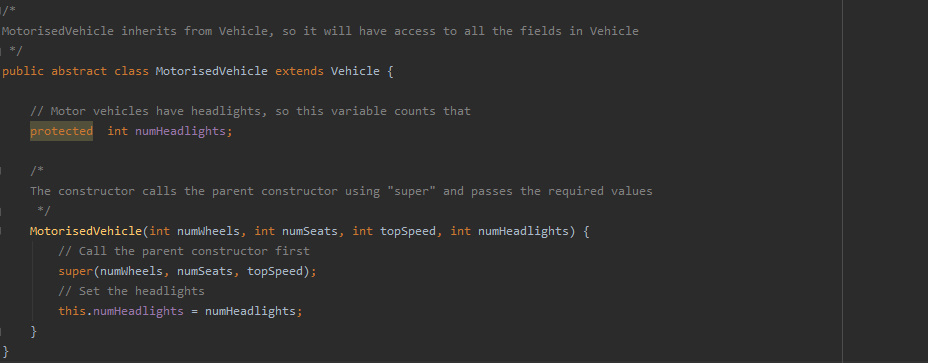
Abstraction is the process of reducing or limiting the amount of information required to represent a given data item. It solves issues at design level, look at our vehicle example in previous weeks. We had only the bare minimum information required in vehicle and the classes that extended it added only the information that was relevant to them.

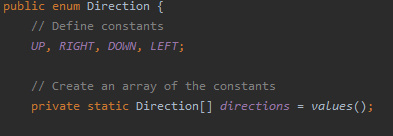
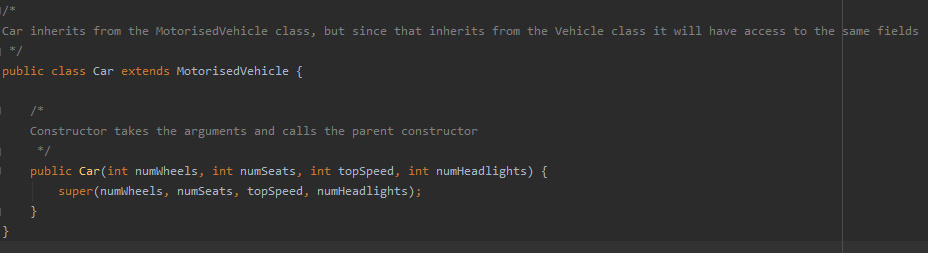
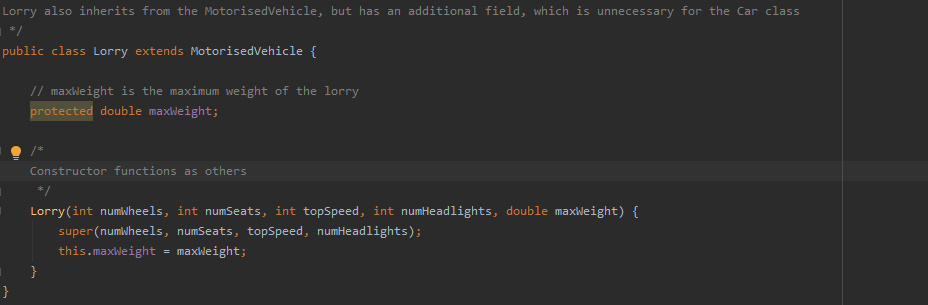
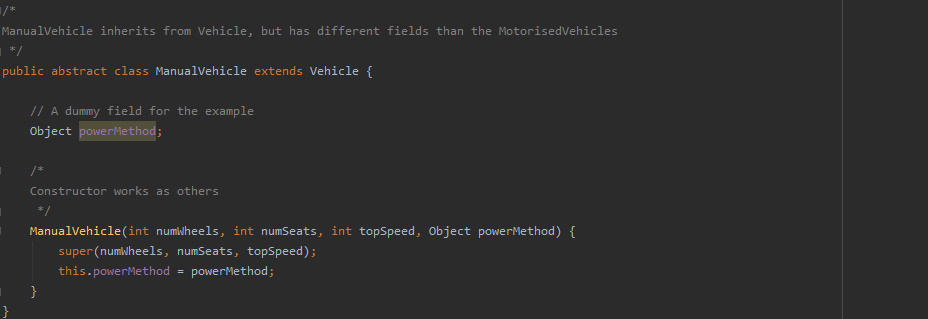
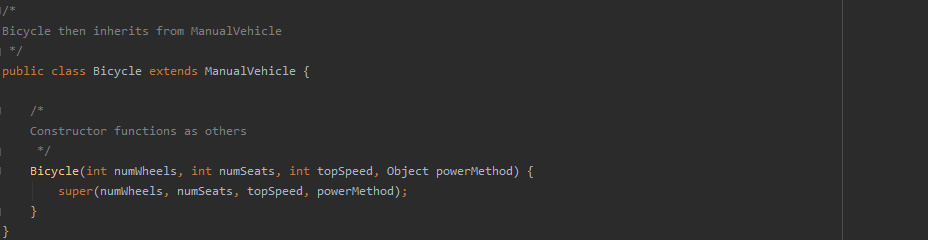
Inheritance is then the process of deriving a class from another. This then yields the parent class (being inherited from) and a child class (doing the inheriting). In the below example, you can see all classes inheriting from the Vehicle abstract class.

Encapsulation is the concept of storing data and methods that operate on them together. This then keeps both safe from interference from external sources. This is done through the access modifiers we’ve seen such as “private” and “public”. When you create a class in Java you are generally using encapsulation to store all the fields with its methods together.

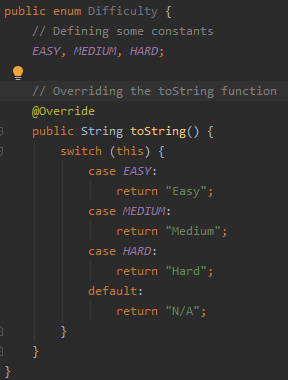
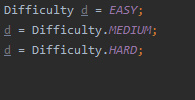
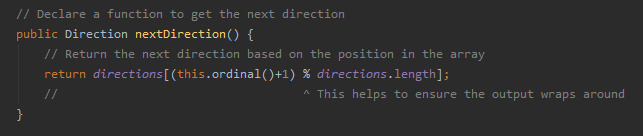
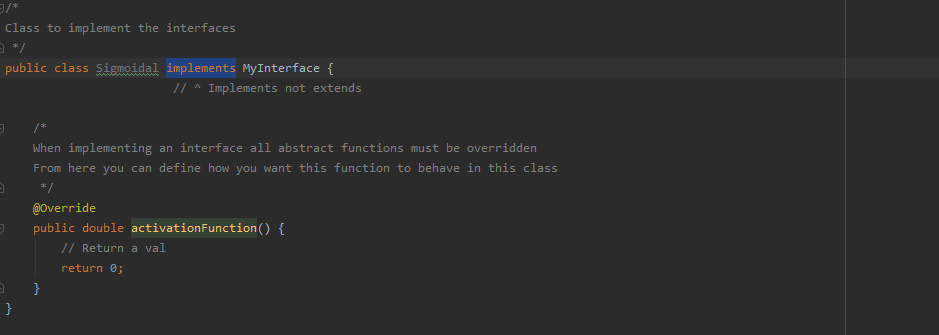
Lastly, Polymorphism is the concept where you can perform the same action in multiple different ways. For example, two people may have the same function “makeCoffee()” but the way in which they do that will depend on the person and the objects give to them. This can be achieved in Java by overriding functions from parent classes, allowing the subclass to perform its own action when the function is called. This is particularly prevelant with interfaces, where the inheriting class is forced to override the function declaration in its parent and implement its own definition for the function.

All thats left to do now is summarise what you’ve learned.

  • Variables, Objects and Data types
  • Control statements
  • Function declaration
  • Abstraction and Inheritance
  • Building interfaces

You should have everything you need to really get stuck in and start making some proper applications! I hope you found this series of guides helpful. Please follow the blog that would be much appreciated and feel free to read any of the other guides produced.

Thank you for your time.

Java Lesson 8 – Building an Application

So when it comes to creating simple interfaces in Java we can use JavaFX coupled with the scene builder that we looked at last time.

When you open the scene builder, it will look something like this, with the option to create a blank interface or choose from templates. For the purposes of this tutorial, we’ll pick a blank design and build the interface from scratch.

The first thing that we’re going to want to do is decided what sort of “Pane” we want as our base, as this can offer us different layouts for our application. For this tutorial, we’ll be using the BorderPane, so feel free to drag an drop that in.

We’re presented with a pretty empty interface right now, so we need to add some elements to it. Let’s start with a MenuBar. Navigate to the elements box on the left and search for the MenuBar.

Drag and drop this element onto the top of the BorderPane. Now it’s starting to look more like an interface.

Next we’re going to add some buttons, which we will add with a ButtonBar and adding some Button objects to it.

We can change properties of the buttons using the pane on the right. This includes the size, text and ID of the button as well as many other properties.

We can do the same for the MenuItems in the MenuBar, which you can see/select in the lefthand bottom tab.

To build on out notepad style application from last time, we’ll put a big TextArea in the middle.

Once you have an interface that looks like this we’ll be good to save the FXML file and create a controller.

When it comes to creating a project that will utilize the FXML file we need a controller class to define what the FXML elements are doing. This is done by declaring a class that implements initializable.

Then, once we have added the compulsory functions, we can start adding fields and functions for the interface to use by tagging them with the @FXML tag. But it may help to ensure that the controller has been set within the FXML itself.

Navigate to the FXML and along the shown line, add the “fx::controller” statement. This means that the FXML now knows what it’s controller is.

We can then add functions and fields for the FXML to use when interface elements are interacted with. This is shown below:

It is important to note that when you want the buttons or menu items to call a specific function, you have to tag the function with the @FXML tag, then add the “onAction” statement in the FXML. This is shown above and below:

Now we have all the functions declared we just need to define them. You should have everything you need to do this so go ahead and give it a try, and if you get stuck, have a look on GitHub for the finished code I did.

And there we have the finished product, a fully functional, working notepad application.

Next time

Next time, we will just be covering theory. We’ll look at how Java actually works and what makes it a good language to learn. We’ll be discussing key Object-Oriented concepts – what they mean and how they’re beneficial. We’ll also have a brief summary of the course and what you’ve learnt.

Java Lesson 7 – Introducing JavaFX

Up until now our applications have been entirely console based. Realistically, we would want a window that the user can interact with; a user interface. Java has several methods for creating functional user interfaces, but for this lesson we’re going to focus on the JavaFX set of libraries.

JavaFX actually stopped being part of the Oracle JDK but luckily, the open source variant is still being developed and worked on.

In order to download the libraries, you’re going to need to go to: https://gluonhq.com/products/javafx/

When you’ve downloaded the appropriate version, you’ll want to unzip it so you have access to the files.

When it comes to setting up the JavaFX in IntelliJ, you’ll want to go to project structure:

Then we’re going to select “Libraries”, use the add button, then navigate to the “lib” folder of JavaFX. If we just select that folder, everything will be included.

Next we need to include some VM arguments in our run configuration. In your run configuration wizard you should see the VM arguments box:

You’ll want to include:

–module-path –add-modules=javafx.controls,javafx.fxml

For example this is how mine looks, your file path may differ depending on your machine and where you put the library files.

–module-path C:\Users\Sam\Downloads\openjfx-11.0.2_windows-x64_bin-sdk\javafx-sdk-11.0.2\lib –add-modules=javafx.controls,javafx.fxml

With that out of the way though, we’re ready to get a special tool for working with JavaFX; the scene builder.

You can find the scene builder tool here: https://gluonhq.com/products/scene-builder/

It allows us to easily drag and drop interface elements into place, and creates something called and FXML file, which we then create a controller for in Java. Then we can assign functions to the interface elements, like buttons.

We’ll look more at scene builder next time, but for now just go ahead and install it, so it is ready.

Now we’re going to create our basic JavaFX application. We’re going to essentially generate a window that we can fill with text, a notepad if you will.

For this we will be using the TextArea object from JavaFX. But first we must set up the class that starts the application.

Create a Main class and let it extend application. For JavaFX applications, we don’t need the main function, instead we need a start function:

We’re now ready to build and show the window.

And with the window built and displayed, the last thing to do is to create and add the TextArea to our notepad.

An there you have it, you’ve just made a bare-bones application with an actual user interface.

Next time

Next time we will be working with the scene builder, making a FXML file and corresponding controller, making buttons and making menus for our interface.

Java Lesson 6 – Serialization

So when we’ve been talking about saving variables and states of applications thus far, we’ve been talking about using text files to write variable data out and read variable data in. In fact Java has a set of classes that are designed to allow you to save entire objects.

This process is called serialization and utilizes an interface known as serializable.

Serializable allows us to “serialize” our Java objects and then “de-serialize” objects when we read them in. This can be helpful for if we want to save the entire state of an application or object.

So how do we use it? Let’s start by creating a class that has fields and a toString method so that we can see the values of the fields at runtime. We’ll also need a constructor that takes some values so that the fields can be set.

The next step will be to implement serializable, which we know how to do from the previous tutorial on interfaces.

We’re going to include a serialVersionUID. This is good practice as in Java, the runtime environment will have a version number associated with every serializable class. It’s then used in the deserialization process to ensure that the sender/reciever of the serialized object(s) have loaded the right classes for that object. Otherwise an InvaldClassException will be raised.

The serialVersionUID must be a long, and must also be static and final.

So now we have our class whose objects can be serialized and saved to a file. But we need a method of writing the objects as files and reading in these files.

We’ll make a new class called FileSerializer and in it we’ll put functions writeFile and readFile

With those functions now defined, we can create a main class that creates and object, outputs the fields with toString, then saves said object and sets it to null. Then the function can load the object and prove it has been reloaded using the toString function again.

And that about wraps it up, you now have all the tools you need to have you applications save and load their objects.

Next time

Next time, we’ll be introducing JavaFX. We’ll be looking at how to download and install the appropriate libraries and applications to help you build basic interfaces for you applications. We’ll then see how to set up a bare-bones JavaFX application.

Java Lesson 5 – Interfaces and Enumerators

Enumerators

Today we will be looking at enumerators in Java. Enumerators, or “Enums” are a special type of Java class. They are used to define a group of constants in your applications.

In addition to holding constants, enums can also contain methods which can be useful for testing and using your enumerator effectively.

Below is a simple enumerator example for difficulty levels:

It defines three difficulty levels; easy, medium and hard. We can then refer to the constants like so:

This method of referencing constants can then be used in conditional statements that we’ve seen before, to check whether our difficulty matches a given type. This can then change the behaviour of the application.

Enumerators can be used for a variety of things, including creating special constant types, defining actions in an order.

This could be useful for defining the behaviour of “AI” in your applications, or for just defining constants for you to use.

There is one more type of class that we will cover in this series: interfaces.

Interfaces

Interfaces provide an alternative method for abstraction in Java, but unlike abstract classes, interfaces are completely abstract. This means that methods are public and abstract by default. In addition, and fields are public, static and final by default.

They are used to group related functions together with an empty body.

Accessing of these interfaces is different to the abstract classes as well. Instead of the “extends” keyword, interfaces require the “implements” keyword.

On the implementation of an interface, you will be required to override all of the methods in the interface, providing your own implementations for those methods.

A further difference between interfaces and abstract classes is that interfaces cannot contain a constructor.

What benefits are there to interfaces then? Well interfaces can be used to implement extensible functionality. Whilst it is much like an abstract class, interfaces are probably better for use in reflection, as they enforce the overriding of their functions, which means user made classes will definitely behave in the way the user has designed.

Next Time

Next time we will be looking at serialization, in particular saving and loading objects and objects that contain other objects. This will invole creating a new kind of file reader and writer.

Java Lesson 4 – Abstraction

Up until now we have been looking at creating pure classes that have one singular purpose and functionality. However, it may be that some classes share very similar functions and fields. In this case it may be useful to use abstraction and inheritance.

Abstraction allows us to declare an uninstantiable class to act as a parent to sub-classes. For instance, we could have an abstract class “Vechicle” and from that class the sub-classes “Car”, “Lorry” and “Motorbike” could then inherit.

The hierarchy could become even more advanced by having further classes inherit from those sub-classes. Below is a class diagram to show how the inheritance works.

To create an abstract class we must first create a class like normal, then insert the keyword “abstract” in the class declaration:

Whatever we declare in this class will be universal to all classes that inherit from it. For the vehicle example, we’ll include wheels, seats and top speed.

Now we can create a class that inherits from the abstract class, let’s take a look at the Car and Lorry example.

Let’s say Car and Lorry share the same field “numHeadlights”. We could encapsulate this into a new class “MotorisedVehicle” and the Car and Lorry can inherit from this instead:

Then we can implement manual vehicles, and a class to inherit from that:

Access modifiers are again important, private variables in the abstract class will not be visible to the sub-classes, so bear this in mind when creating your classes.

There are many uses for abstract classes, one of those we’ve seen here. But another good use for abstract classes is to allow the loading of external class files at run time. If your application runs classes that inherit from an abstract class, it could then be possible for other uses to write classes that inherit from it too. These new classes could then be used at runtime using something called “Reflection”.

We won’t cover reflection just yet, but it is something important to bear in mind for allowing users to create plugins and files for use in your future applications.

Interfaces are another interesting type of Java class, we’ll be looking at them next time, but do keep abstract classes in mind as we go through them.

Abstraction and Inheritance are both key elements of object-oriented programming and design, the idea that you can minimise the amount of code you have to write by organising your classes into a hierarchy has been an interesting area of programming since its inception. The concepts are pretty much commonplace nowadays and if you are unfamiliar with the concepts behind object-oriented design, I would strongly advise you go and research the area yourself.

Next Time

Next time we will be covering interfaces as we said earlier, and enumerators. Both of these are other types of Java class in a way and offer us interesting features to use in our applications.

Design a site like this with WordPress.com
Get started