Initial tutorials on this blog will be about programming, particular Java, but I will also branch out into Python, R, C, C++ and possibly others as time progresses. I will be uploading the tutorials to YouTube and detailing the tutorials in text form here. Hopefully I can help at least one person learn to code.
How much will it cost?
Absolutely nothing. This blog is part of a project in my MSc, in which I take a digital marketing module where I have to plan and implement a blog, tracking the traffic and trying to increase the exposure the blog can get through various channels. So, with that being said, subscribing to the YouTube channel or the blog and sharing the content would be a great help but is not mandatory.
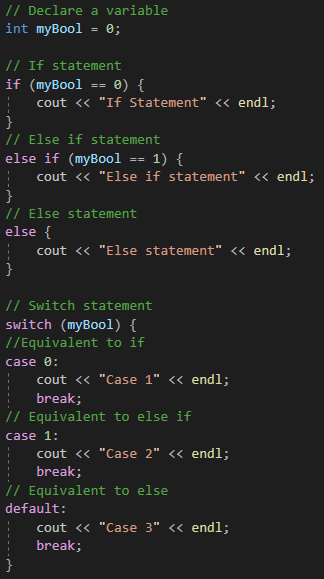
Today we’ll be looking at control statements in C++. We’ll start by looking at conditionals.
Obviously, we have access to the same conditionals that are in C. This includes:
If
Else
Else-if
Switch
And these can be implemented in the same way. This is shown below:
These can be used to control the flow of your application, allowing the behaviour to change based on the states within the application.
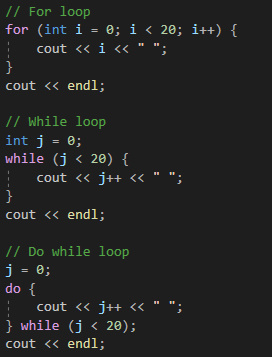
Next we’ll be looking at loops in C++. You have access to the same loops in C, which includes:
For
While
Do While
Which can be implemented as so:
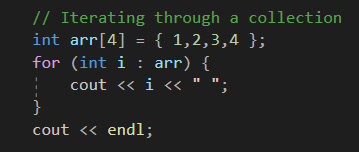
Whilst the structure and main syntax of the loop is the same, in C++ you have access to iteration over collections. This is done in the same way we do it in Java:
Further to these control statements, GOTO exists. GOTO is the perfect example of the situation where just because something can be done, doesn’t mean it should be.
This is because it can make the code jump out of scope and create other bugs in the code, so it’s best to avoid it at all costs.
Next time
Next time we’ll be looking at classes in C++, we’ll be creating and using classes in our own applications.
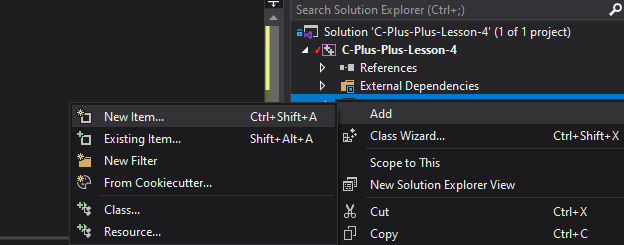
Today we’re going to be making header files in C++. Visual Studio makes this very easy to do and in fact, if you’ve watch the C series, you’ll probably already now how to do this.
To start, in Visual Studio, we’ll want to create the header file:
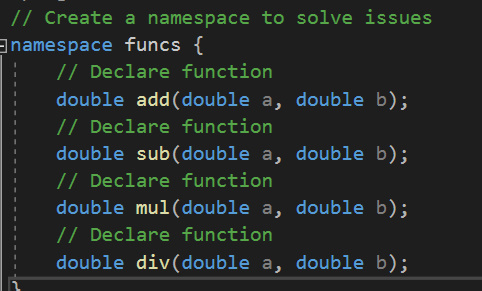
In here, we’re going to declare the functions, for this tutorial, we’ll do the mathematical functions again:
Now you can see that the functions have been declared, but there is no definition, no function body.
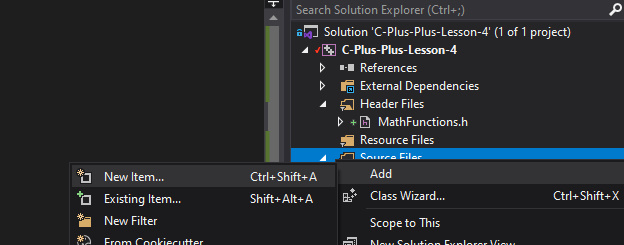
We need to define the function in a separate file, so we’ll need to create a .cpp file to go with the header, like so:
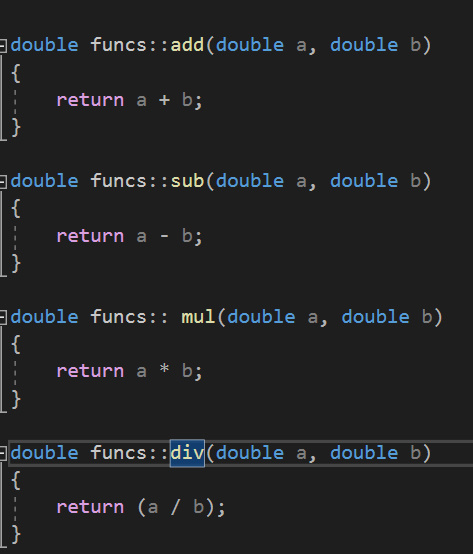
In this file, we can then write the actual method bodies for the declared functions:
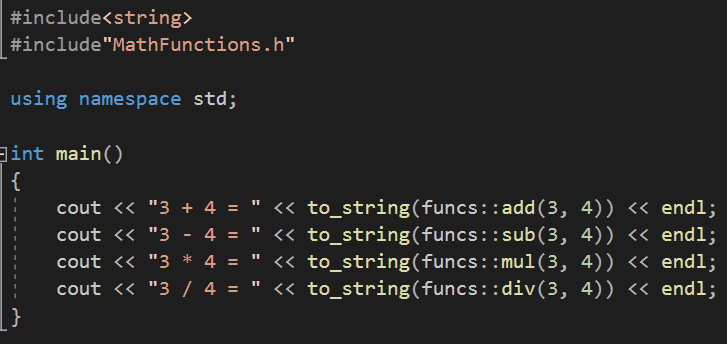
And that is the header file created, along with the corresponding source file. The last thing we need to do is include it in our code and test the functions:
Next time
That’s it for this time, next time we’re going to be having a look at loops and control statements in C++. We’ve already seen some of these in our previous tutorials, but C++ gives us access to more loop styles, including iterating through objects of a collection.
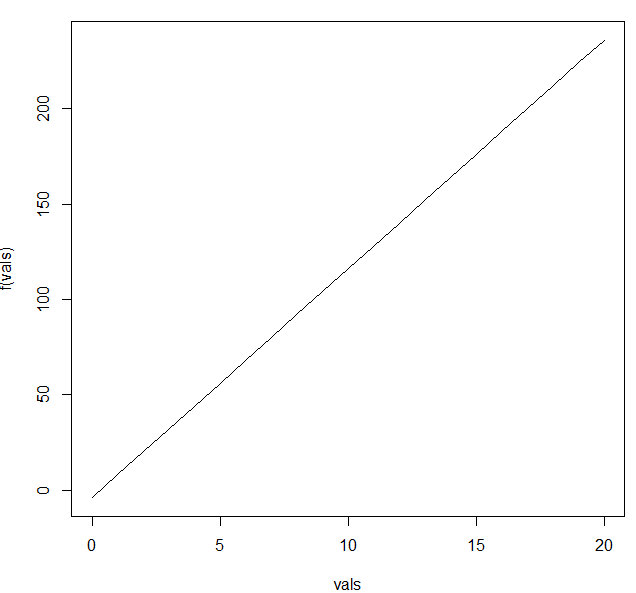
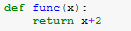
Today we’ll be looking at writing some functions in R, with the goal being to create functions that can perform mathematical equations. For example we can make a function f(x) that takes an input and returns some output value:
With that in mind, you can then plot the function:
So you see that it is possible to create a mathematical equation in R.
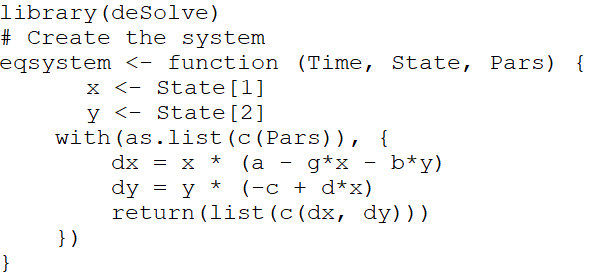
Given that fact, it should then be possible to do other mathematical things in R. One thing we can do is solve a system of differential equations:
Or this same process can be used to solve higher order differential equations.
R also has a function ODE which can be used to solve ordinary differential equations.
Since the language primarily utilizes vectors and matrices, it makes sense that you’d be able to do singular value decomposition, as well as finding the covariance matrix.
At the end of the day, R is a language that was primarily developed for mathematics. It makes a lot of sense that maths would be a core focus.
That will wrap up our R tutorial series. I hope you enjoyed the brief look at getting started with R and go on to use R more in the future!
The last thing we’re going to cover in this series is data visualization in Python. Today we’ll be taking a look at some of the graphing tools available in Python.
When it comes to visualizing data in Python, there are two main libraries that you’ll be using; Matplotlib and Seaborn.
There are advantages and disadvantages to each package, and it generally falls under personal preference, combined with your objective to determine which library you’ll use.
Matplotlib offers plotting tools for the majority of your basic graphs, where Seaborn has a larger focus on statistical visualization.
Moreover, it will depend on how you’ve stored your data within the application, since Seaborn is built for working with Pandas dataframes, whereas Matplotlib can handle both the dataframes and NumPy arrays easily.
One of the main deciding factors is that Matplotlib is just more customizable, including features that Seaborn removed for simplicities sake.
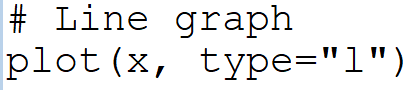
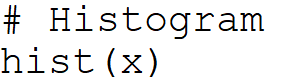
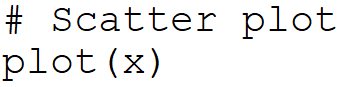
We’ll take a look at how to plot some charts using Matplotlib:
And we’ll also check out some plotting functions Seaborn:
It’s pretty clear what all these functions do, or rather what the generated plots will be. So have fun with it, try messing around with the parameters and see what you can come up with.
Ultimately, as said earlier, the library you use will largely depend on the problem domain, so make sure to plan ahead! If you get stuck, read the documentation. The documentation for Python is extensive and will cover any question you may have.
And that concludes the Python tutorial series. I hope you found this helpful.
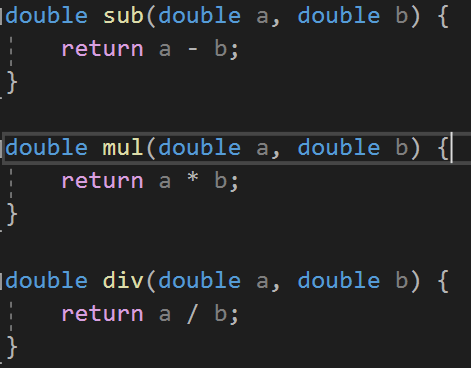
Now we’re going to take a look at function writing in C++. It works exactly the same as writing functions in C. We can either declare at the start of the file and define later. Order is important for the compiler, it needs to at least know the function exists before it is used within your code:
In C++ we can return just about anything, including objects. This includes strings, vectors and the primitives we looked at last time.
With that in mind, we can write functions for the four base mathematical operations, taking two numbers as arguments:
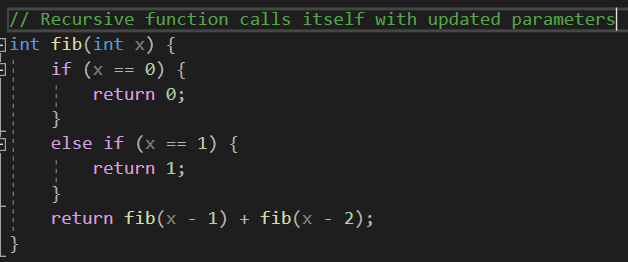
But there is a type of function used in algorithmic programming that allows for divide and conquer approaches and has numerous other applications. These are known as recursive functions. We can examine the example from the C series, for fibonacci sequence generation:
Next time
That’s it for this one, next time we’ll be looking at header files in C++.
Today we’ll be looking at variables, this includes primitive data types as well as some useful objects available in C++.
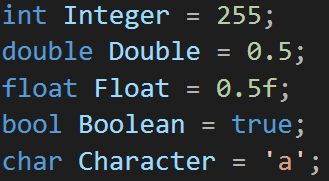
We have access to the same data types we do in C, those being:
-int -double -float -bool -char
Which can be declared as so:
In addition to these, C++ gives us access to a multitude of objects that come with C++ standard libraries, much like we’ve seen before in Java.
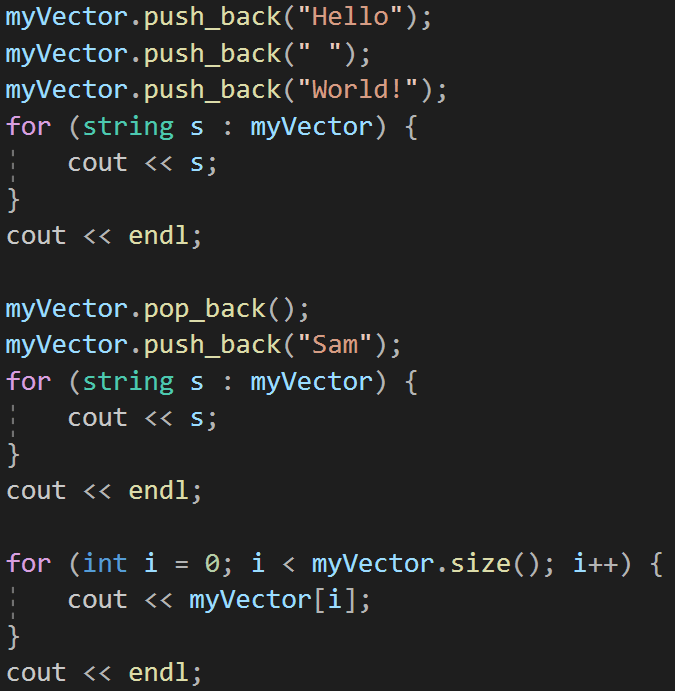
We can use strings, vectors<> and many other objects that were not available in C. They can be declared like so:
Strings are obviously just like strings in other languages, but vectors are a type of collection. They act somewhat akin to ArrayLists in Java that we’ve looked at before.
You can push_back elements, remove elements and even index to get/change elements in the vector:
As you can see, C and C++ has a lot of overlap, or rather most parts of C are included in C++. To put it in perspective, you can think of C++ as a superset of C, or as I like to call it, the object-oriented expansion.
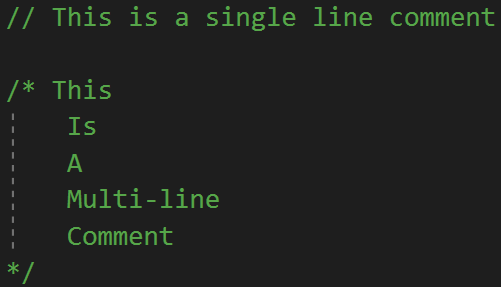
This means that you can reuse a lot of C concepts in your C++ code, including comments. By default, we have access to two different comments:
-// Single line -/**/ Multi-line
And these are written like so:
It’s prety similar to Java, just the JavaDoc comments are missing. If you want JavaDoc style comments in your code, packages exist to perform the same functionality.
Last thing to touch on today is the namespace issue. All the things we’ve looked at thus far have utilized the “std” namespac, which is why we’re “using namespace std”. It is possible to have more namespaces, which is particularly useful when using more libraries, for example the OpenCV library for image processing.
Next time
That’s it for this time, next time we’ll be looking at writing functions, so we can compartmentalize our code. We’ll examine both normal and recursive functions.
Today we’re going to be looking at functional programming in Python.
To start with, we’ll look at mathematical functions. These are in the form of f(x), which will only have one value. That means that for any given x, f(x) is always the same. However, multiple x can have the same f(x).
It is important to note that mathematical functions often do not behave like computer functions. Let’s design a mathematical function:
These are also called pure functions. These always produce the same output when given the same arguements.
In Python, we can use functions as values. This is not unique to Python, it is something interesting that can be done:
Python allows us to generate functions quickly through the lambda keyword. These are known as anonymous functions.
Although no name has been assigned to the function as it is defined, you can assign the function to a variable.
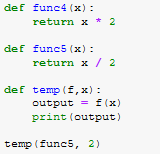
Higher order functions take other functions as arguments and operate on them, or return functions as results:
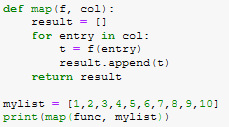
Functional operations are a way of applying a function to every element of a collection. Let’s examine this with respect to map:
Under this bracket of functional programming comes list comprehensions. This is a quick and easy way of applying some operations to some group of objects:
Next time
That’ll about do it for this lesson. Next time we’ll be looking at data visualization in Python.
Now that we’re all set up and ready to do some actual coding. For this we’ll be doing the classic “Hello World!” example.
To begin with, create your project. You’ll notice that when you create the the project it will come with the “Hello World!” already created.
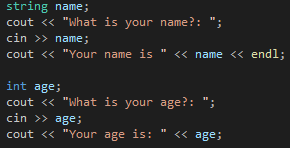
So lets walk through what is going on. Firstly, there is there is a library included “iostream”. This is the input/output stream library that allows for the input to, or output from the console.
Then if we go into the method body, we’ll see the “cout” function. This is the function that is outputting the string to the user. You could change the string in the statement to be anything you want.
It is important to note that we use the namespace “std” as seen here:
This allows us to use the raw “cout” as opposed to “std::cout”. From the “iostream” library, we also have access to the “cin” function, which allows us to take in user inputs. Let’s try that:
This application asks for a user input and returns what they said. With this you can read in any input from the user.
Next time
That will cover it for this time, next time we’ll explain variables and objects in C++, demonstrating comments and exploring the namespace issue a bit more.
Today we’re going to be getting started with C++. If you’ve been through the C tutorial available on the blog, you’ll already be set up with everything you need.
For the sake of any newcomers to the blog, we’ll be covering how to get started with C++.
Firstly, we’ll need an IDE to make our C++ projects in. For this we’ll use the Community Edition of Visual Studio, found here: https://visualstudio.microsoft.com/
If you’re on a Mac, you’ll need to use Visual Studio Code, which has reduced functionality, but should give you the bare minimum you need.
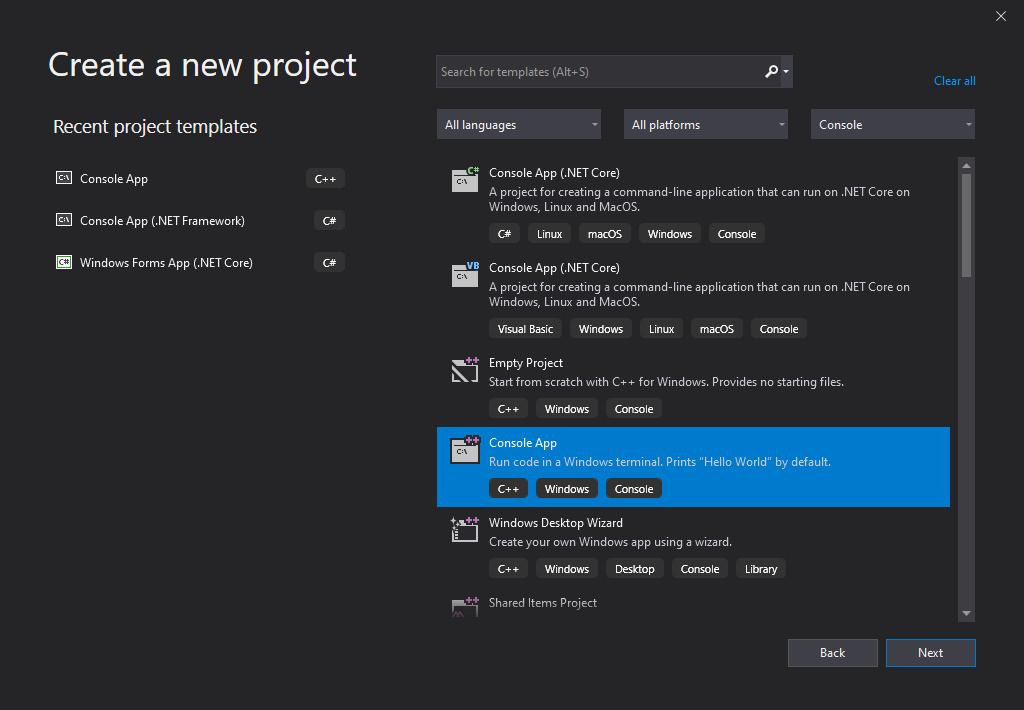
Once you’ve downloaded and installed the application, you’ll want to run it an create a new project on this screen:
Then we want a “C++ Console Application” and that’ll be it:
That’s all we need to do to get ourselves set up in C++, from here we’ll be able to make our projects.
Next time
Next time we’ll be doing the classic “Hello World” in C++, because it is such a classic. We’ll be looking at making the main function and which library we need in C++ for console I/O (it’s better in C++).